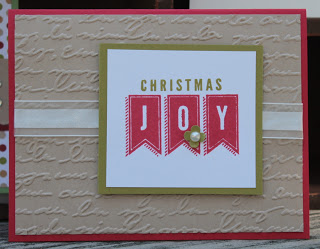
Hello and happy Saturday! The weather is absolutely beautiful today so after spending the morning in my stamp room working on some projects for the upcoming Cool Crops event, I’m headed to the beach!
But I wanted to stop by with some quick tips for making your own holiday cards this year — but without the frantic last minute stress.
So without further ado, here are my thoughts:
1. Start early! Well, duh… that’s why I’m posting this in September. Of course we all have good intentions of creating beautiful hand-stamped cards for our friends and loved ones, but as time slips by (because clearly September is too early to be thinking about this — or is it??). Start now! Start with this:
2. Write a list of who you would like to send cards to. Once you get to the point of creating your cards (and hopefully ordering SU supplies), you’ll need to know how many finished cards you’d like so you know how much paper and envelopes to order. And just think how great it would be if you created a nice little list with addresses and everything so when you get to the card-writing part, you can just snuggle up in a chair write your merry wishes and have all of the addresses at your fingertips. Easy Peasy!
3. Decide what style of card you would like. Do you want a whimsical card? Religious? Winter-y card (this is always great because if you do happen to get behind and send them late it can be a happy winter card instead!)? Another note: this Snowman set is perfect if you’d like a winter-themed card. Once you’ve decided the style(s) of card you like (I always make at least two designs because I get bored), then browse for some stamp sets that might do the trick.
4. Select the colors you’d like. Do you want classic red and green? Maybe some less traditional blue and silver (this paper would be perfect) or maybe you prefer a more natural coloring with just a pop of red or a pop of green? Really… anything goes!
5. Set a “create” day on your calendar (or two). It so much less stress (and more exciting) to pick a day a few weeks or even a month out at this point when you plan to sit down and design your card(s). Then you know when you’re going to do it and it’s not looming in the back of your mind. (It’s even better when you recruit a friend to stamp with you… and so much more fun!). Don’t forget to order your supplies at least two weeks prior to your “create” date so you’ll have everything ready.
6. Set a “produce” day. Once you’ve designed a card(s) you love. Now set a day to mass produce all of these cards. If you were quick on “create” day, you could even pre-cut all of the supplies you need to produce the end product and then when “produce” day comes you just sit down and assemble. Or you can save all the cutting and assembling for the same day or two new days in the future. Again, just make sure you put it in your calendar. Treat it like a dr.’s appointment or family obligation — this is important to you. Make time for it.
7. Set a writing day. Last on the list is to find a day when you’re going to cuddle up in that chair and write little notes to your family. (If you do a general family newsletter this will be a super quick day). I personally like to send a hand written note in each of my cards, but I am a little crazy (especially considering I send out over 200 usually! Hence why I need to start now!)
If you need any ideas the Stampin’ Up Holiday Catalog is full of adorable samples. Check it out here. And feel free to shoot me any questions!
Have a great weekend… Until next time, I’ll be By The Shore Stamping (or maybe at the beach)!

